Ok, that’s a bit of a ridiculous claim. A million times better? Really? Well, I’m sure these tips will help make your photos at least 50 times better. Now that sounds more believable. Let’s continue.
I love photography, it’s pure magic. So it tears me up inside whenever I see terrible photos that could have been so much better. Many times when we are out and about I get asked by a friendly tourist to take a photo for them. They hand over their compact camera and point out the shutter button, and dash over to pose for their memorable shot. I politely take the shot for them, but it’s nasty and I silently cringe a little.
This scene has played out too many times, and so I’ve dedicated the time to write this post in an attempt to save the world. Save it from more terrible holiday photos.
You don’t need super expensive fancy photography gear to take a nice shot. But you do need to ensure you do not commit one of these mortal holiday photo sins. Please read it and re-read it, repent of your wicked ways, then share it with your friends so they can be enlightened too. And then tell them to continue to share it otherwise you’ll leak embarrassing photos of them on Facebook. That should do the trick.
Without further ado, here are my 8 super tips that will turn you into a mega famous photography guru without spending a cent. Oh, is that too hyped again? Sorry.
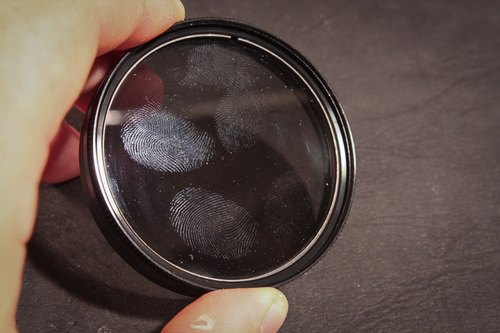
1) Clean the fricken lens, dude!
The number one reason why your photos look crap is not the cheap compact camera you’re using. It’s the giant finger smudge on your lens. Oh, please save me from tearing my hair out, and just use a simple lint-free cloth to gently remove any smudges from your lens. Hold the camera up to a light or the sun to get a better view of marks and gently rub it in a circular motion. And presto, the marks are gone! You probably have a suitable cloth that came with your pair of prescription glasses or sunglasses. Or if you’re using a smartphone, just rub the camera lens on the inside of your shirt. Instantly you’ll make the world a better place.

2) Use a lens cap for a DSLR or camera case for compact cameras
Once you’ve got your lens squeaky clean, keep it that way. Chances if you’re using a digital SLR (DSLR) or interchangeable lens (ICL) style camera, it came with a lens cap. Make sure you carry it everywhere. In fact, mine is always on my camera in between shots. I don’t want to stop whatever I’m doing mid-shoot to clean my lens. 99% of accidental fingers on the lens are avoided this way.
3) Read the manual – eek!
If you’re a guy, you might have trouble swallowing this tip. But trust me, it will help you. Learn what the camera’s pre-configured settings mean: candlelight, sports, snow/backlight. Find out how to access those settings. Please, for the love of God, don’t use “automatic” (A). Understand what “aperture” and “shutter speed” means. And if your camera has a HDR (high dynamic range) feature, understand how and when to use it.
4) Turn off the automatic flash please!
Taking night shots of a building far away with the flash won’t work. Shooting subjects behind a glass window with the flash won’t work. There are very few occasions where the built-in flash is needed. In fact, when I was visiting a zoo recently I noticed a tourist next to me using a fancy DSLR camera with his in-built flash, terrorising an innocent insect inside it’s glass enclosure. He was only capturing shiny white reflections on the glass. I couldn’t stand it, I casually wandered over and recommended the no flash option. The next shot he took was actually passable, not a white blur.
5) Understand the basic concepts of composure
Learn how to frame your shot. Use the “rule of thirds” to position your subject in the right spot – either one third from the left or right edge of your frame, and then preferably one third from the top or bottom. This technique makes your shots look more interesting instantly.
Most cameras have a built-in focus feature when you half-press the shutter button. Understand what focus methods your camera supports. Usually it will be on some kind of “automatic” setting by default. You’ll have a lot more control by choosing “centred” instead. Then simply half-press the shutter to focus on your desired subject, and move the frame sideways, up or down to achieve your balanced “rule of thirds” scene. You’ll look like a pro in no time. Here's some examples to help you visualise:


6) Shoot in RAW, if possible
If your camera supports RAW format, shoot in that to capture more detail. You may need an extra memory card since RAW images are much larger in size (they capture more detail), but it will be well worth it. Sometimes you only get 1 chance to capture that special moment. So grab as much detail as possible using RAW. Some cameras support saving the file in RAW and JPEG formats at the same time which is even better. You will need to eventually convert the file to JPEG in order to use it for the web or email. This brings me to the next point…
7) Post processing
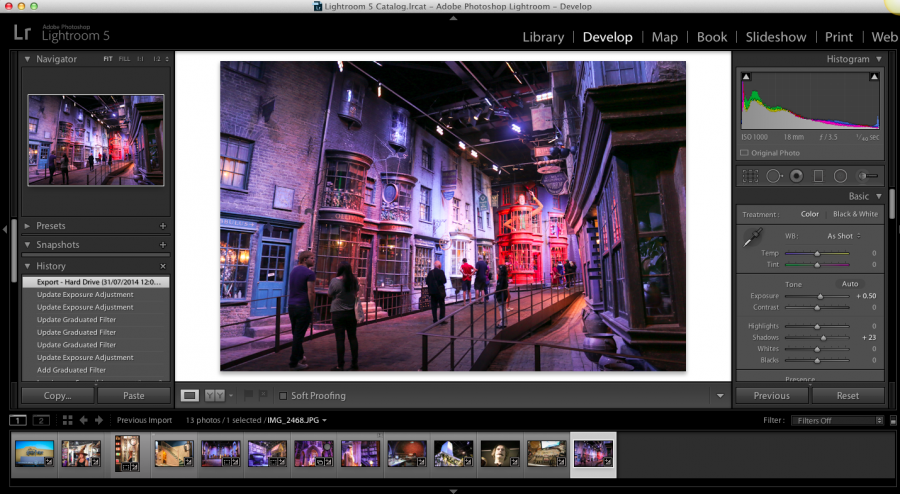
In line with the previous point, try using some free software to edit your photos. The human eye can see 11 “stops” of light, but a high-end DSLR camera only capture about 3 “stops”. If that jargon sounds too confusing, don’t worry. It just means your eye sees more than a camera. So balance the highlights and dark areas and correct those mismatched colours.
I prefer using Adobe Lightroom (which unfortunately is not free). It’s the industry standard and has a lot of neat features.

But there are also some free software packages like GIMP if you’re on a tighter budget. Once you’ve made all the desired changes, simply save (or export) the image into JPEG format and it’s ready to share or print.
If you want to shoot amazing HDR photos, ideal when capturing a scene with wide range of brightness, then Photomatix is the most popular multi-frame HDR processing software. This topic is a little too complicated for this list to discuss in detail, but if you’d like to read more, take a look at Trey Ratcliff’s video tutorial from Stuck In Customs.
8) Read up about photography
Now that you’ve started to actually take some decent shots, you might find you enjoy this. I know, it’s addictive. There are lots of great free blogs that specialise in tutorials for photography, from which camera lens to choose, to how to shoot stars at night, you’ll find the answers. You can learn almost everything you need to know without spending a cent. Here are a few of my favourites that will help beginners:
digital-photography-school.com
digitalphotographysecrets.com
exposureguide.com
digitalcameraworld.com
photobox.com.au
When you take your camera on your holiday, it’s a statement. You’re saying that you are doing something important enough that you want to capture the moment to relive it again and again. It’s precious. It’s a memory that you want to keep as vivid as possible. And photography is powerful like that. This is why I want to help you make the best possible memories.
Or perhaps you just want to show off to your friends on Facebook how cool your holiday is and make them jealous. Either way, I won’t judge.
But one thing is for sure, once you put these timeless tips into practice, your holiday photos won’t be nasty anymore. In fact, they’ll look pretty darn good. Yep, I think you might have escaped photography purgatory. And together we’ll make this world a (slightly) better place.


Reader Comments...
"I respond to every comment by direct private email. I look forward to your feedback" - Josh BenderGreat article! Erin, could you ask Josh - if my camera saves in RAW & JPEG (mine does, set it to dual fine due to Josh's recommendations ), then will it transfer to the laptop in both also (so tech-inept me doesn't have to alter anything to use the pics!)? Thanks!!!
I knew all that! But I did once spend a whole day shooting with a great big thumb print in the middle of the lens. ( kids + cameras!)
Guilty as charged. I sure could learn from these tips. Thanks!
Great tips Erin. Even after 15 months of travel Andrew and I are still getting to grips with how to use our camera, it's one of those things we've been a bit lazy about but you're right, some simple steps can make a huge difference.
Josh and Erin, 'clean your fricken' lens dude' not only make me crack up laughing, but has sent me into a cleaning frenzy. Gordon finds the way I keep my gadgets to be dreadful... and he is wondering why I am finally listening to him. Our secret ..ok. Thanks for a great article,
We use pixlr to edit many of our photos, it is free, and while there is a learning curve, we like it a lot :) But great post! Alex and I often chuckle at the person using their flash to capture something on the other side of glass!
Very useful advice. I have checked some random photos and it is there. Any photographer who knows these little tricks can immediately improve his skill 100 %. However, I still believe that having a good quality camera and not using Instagram is the way to go.
"Please, for the love of God, don’t use “automatic” (A)" - I am trying, believe me! Too many years of lazy auto use is a hard habit to break.
Some great tips! I'm afraid I'm useless with a 'proper' camera and must confess I take most of my snaps on my phone (I know, I know!!). I've found there's some great post production apps that are free to download and really help to make you phone pics something you'd want to show your friends though. Although I don't think I'll ever quite be able to contend with the results from an SLR!
I cringe, too. Photography is part magic. And bad photos are a little like sacrilege, albeit necessary at times.
Write Your Comment
Please DO NOT include links, URLs or HTML in your comments - they will be automated deleted and you will waste your time.