Photography, like most art forms, is about constantly developing your skills and pushing your creative boundaries.

If you own a digital SLR camera (DSLR) and are getting comfortable with daylight shooting, then the next natural progression is capturing the night. Recently I took the NYC After Dark Photography Tour thanks to Viator to brush up on my low-light photography skills, and also get more familiar with something I have tended to shy away from – the flash. Our guide, Zim, had over 20 years industry experience and was a wealth of knowledge. And just as importantly, it was a fun evening out with like-minded photography enthusiasts.


I regularly receive questions from readers about beginner photography tips, so this article will help answer some of those. But I’m also hoping to inspire you to push your hobby forward and try new techniques. And if you’re like me and learn best in a hands-on environment, then I encourage you to try a local photography tour like the one I went on. Practice makes perfect.
Night Photography Inspiration
Before I get into the nitty gritty, take a look at these 8 photos as examples of the types of images you can create when you put these tips into practice.

Long exposure light trails – Fairmont Château Laurier in Ottawa, Canada. 14mm, f/11, 15 seconds, ISO 100, flash: none
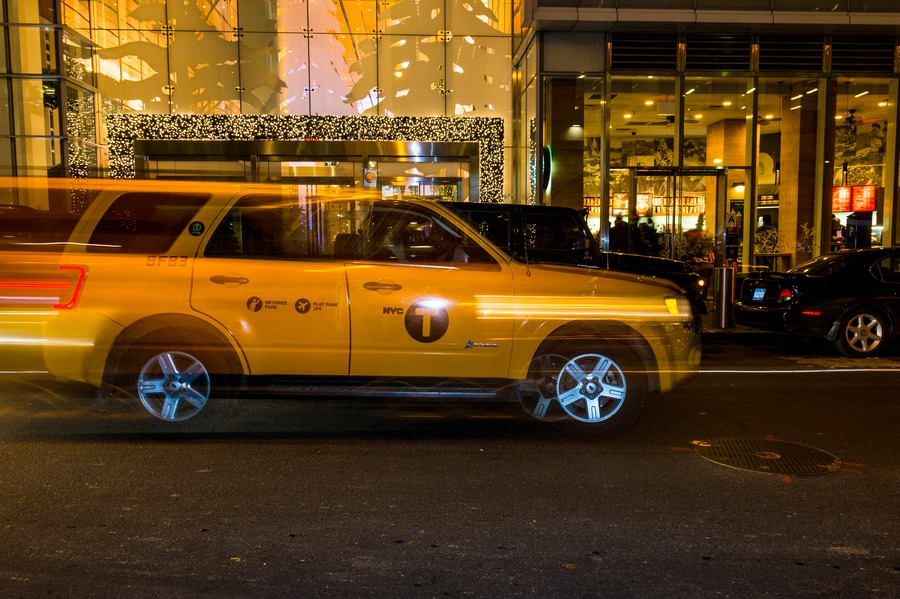
2nd curtain light trails – taxi in New York, USA. 18mm, f/8, 0.6 seconds, ISO 100, flash: built-in fired (2nd curtain)”

Light painting – Cave & Basin in Banff, Canada. 10mm, f/5, 25 seconds, ISO 200, flash: none
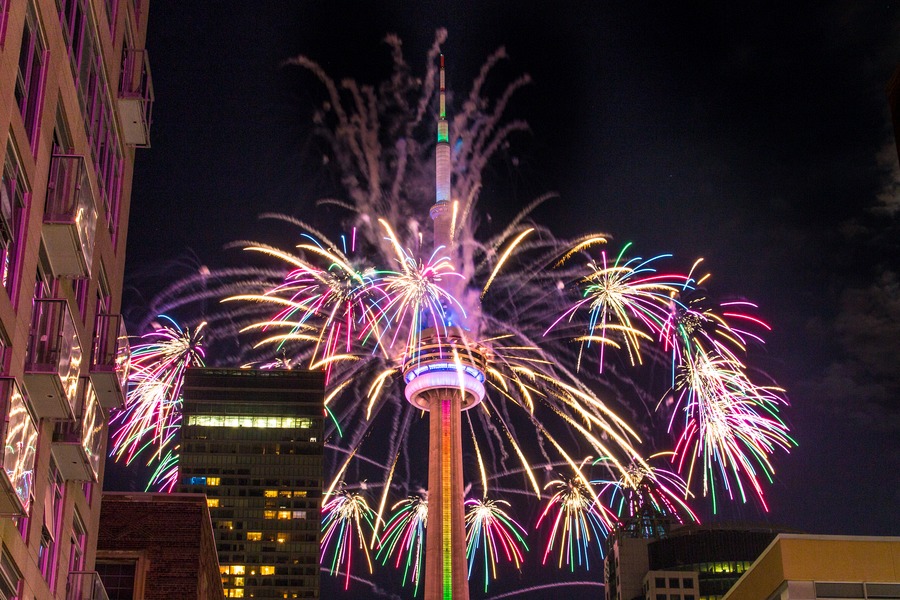
Fireworks – CN Tower in Toronto, Canada. 39mm, f/9, 1.6 seconds, ISO 200, flash: none
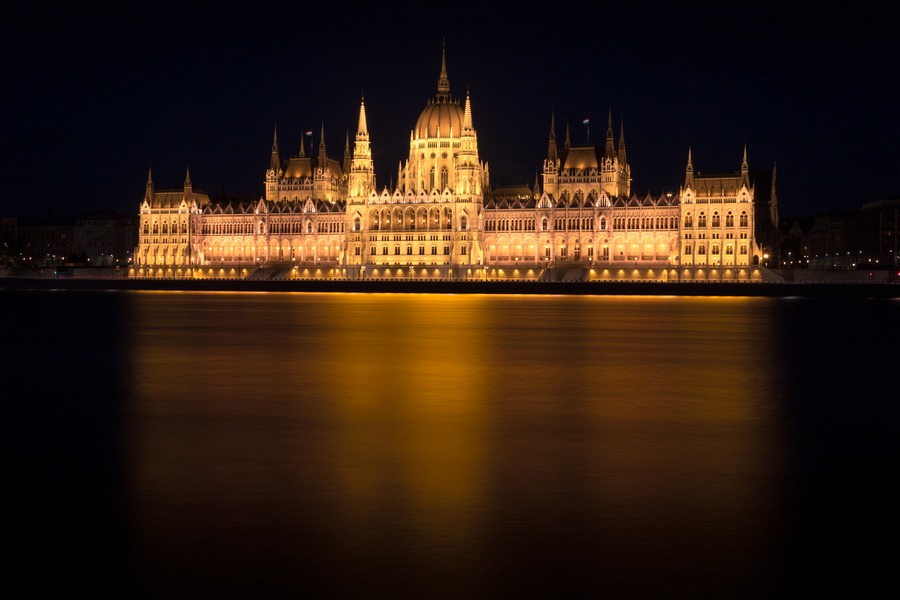
Smooth water – Parliament building in Budapest, Hungary. 28mm, f/16, 51 seconds, ISO 100, flash: none
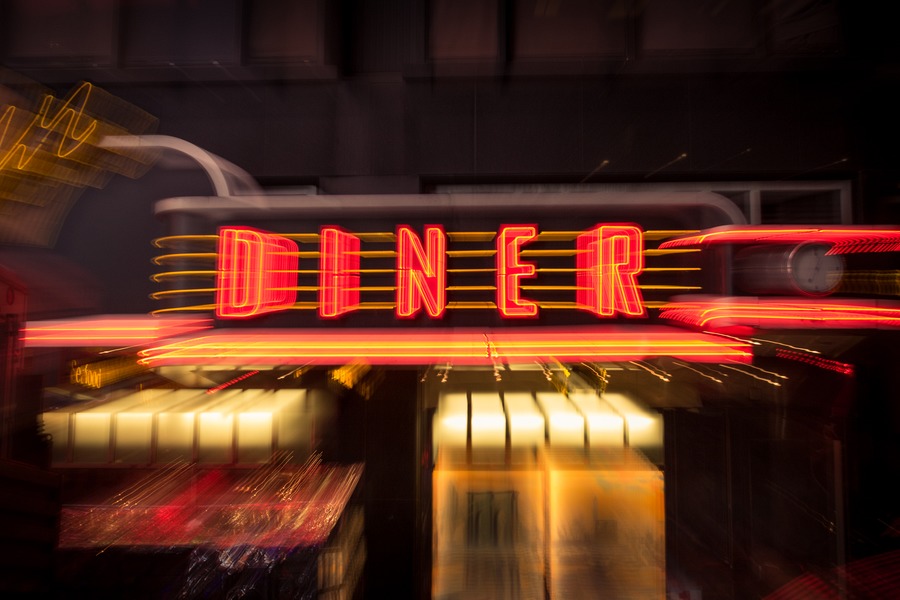
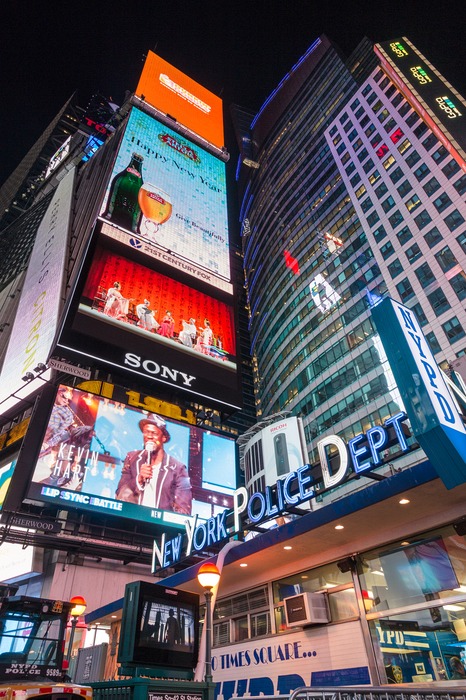
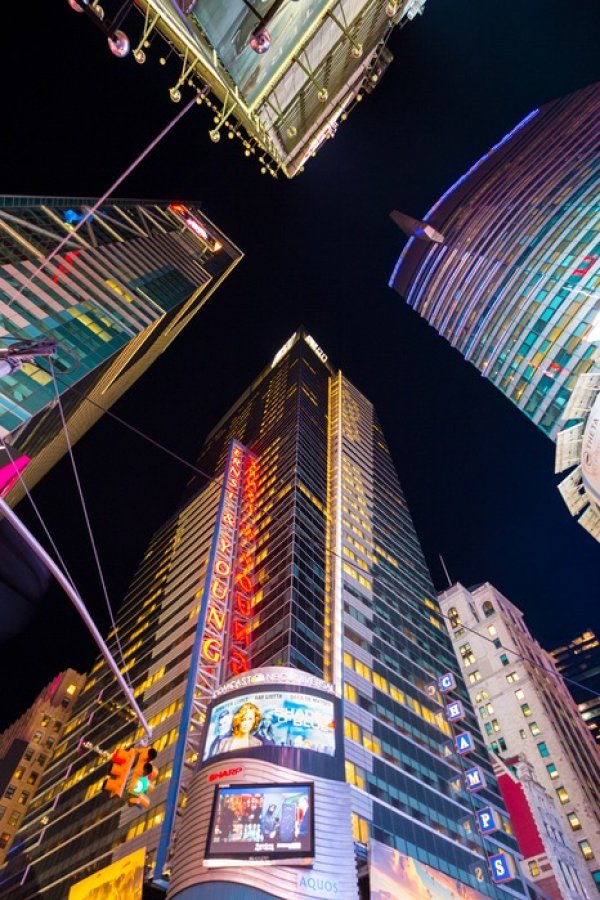
Zoom burst – Times Square in New York, USA. 38mm, f/8, 0.25 seconds, ISO 100, flash: none

Handheld panning – taxi in New York, USA. 33mm, f/10, 1/13 seconds, ISO 1000, flash: none

Ghosting with flash – New York, USA. 24mm, f/80, 1 second, ISO 100, flash: built-in fired (1st curtain)
Travel photography tip: Find out how to connect to the Internet to share your photos from anywhere in the world. Yep, unlimited wireless Internet access with a magic little black box.
Read my review...
Night Photography Tips
To avoid frustration grab your camera manual, as it will provide detailed instructions on how to use the settings mentioned below. While I’ve referred to Canon and Nikon, the steps will be fairly similar for other brands like Sony and Panasonic.
1) Use a tripod
This is a non-negotiable tool for night photography. In order to capture the sharpest image possible with the least amount of noise (low ISO), exposure time will have to be longer than regular daylight photography.
I currently use a Vanguard Alta Pro 254CT tripod (see all my photography gear), which works a charm. Sturdy and solid are the keys. Anything too flimsy may move in the breeze.
2) Shoot in RAW
If you aren’t already recording your images in RAW format, then now’s a good time to start. RAW is a lossless format which means you’ll be able to extract more detail later in post-processing.
Canon users: Go to “settings” menu then click “quality” and choose “RAW”.
Nikon users: Go to “shooting” menu then click “image quality” and choose RAW, then go to “image size” and choose “large”.
TIP: I use Lightroom for post-processing which is the most popular software amongst photographers for very good reason. It’s powerful, fast and easy to use.
Alternatively, Paintshop Pro from Corel is another popular Windows-based image editor.
3) Manual focus
Even pro-quality cameras can have trouble automatically focusing in very low light situations. So look for the focus switch labelled “AF/MF” on the side of your lens and move it to “MF”. Now you can turn the focus ring until the desired portion of the scene is in focus.
Because your subject may be far away or dimly lit, it’s best to use “live view” mode (your camera’s LCD screen) to see more detail. Modern DSLRs will allow you to zoom in multiple times which is the key to ensure tack sharp night photos.
Canon users: more details on “live view”
Nikon users: more details on “preview zoom”
4) Turn off image stabilisation
If your lens supports “vibration control” or “image stabilisation” (same thing with different name, depending on the manufacturer), then turn it off when using a tripod. While it can be very handy for hand-held shooting, it will only add minute movements of it’s own.
5) Use remote release or built-in timer
Pressing the shutter button on your camera will produce vibration, and vibration is the enemy of a tack sharp night photo. There are 2 ways to avoid this – buy a remote release or the cheaper option, use the camera’s built-in timer.
The majority of cameras support 2 and 10 second timers and exposures of up to 30 seconds. However if you want to go longer, then switch the dial to “bulb” (B) mode. The catch is that you either have to hold onto the shutter button the entire time (and risk adding vibration) or use a remote release. My Canon EOS 70D has built-in Wi-Fi so I can use my smartphone as a remote release.
6) Choosing right white balance
If you’re shooting in RAW and the white balance is off, you can usually recover that in post-processing. But why make more work for yourself? Changing the white balance from “auto” to “sunlight” will produce true colours for most night cityscapes.
7) Remove UV filter
If you’ve attached a UV filter to your lens, you should remove it for night photography. The additional surfaces can cause refractions from moonlight, streetlights and illuminated signage. A lens hood is an alternative way to protect your lens, and in addition, keeps out unwanted stray light.
Check latest prices on filters...
8) Use wide-angle lens
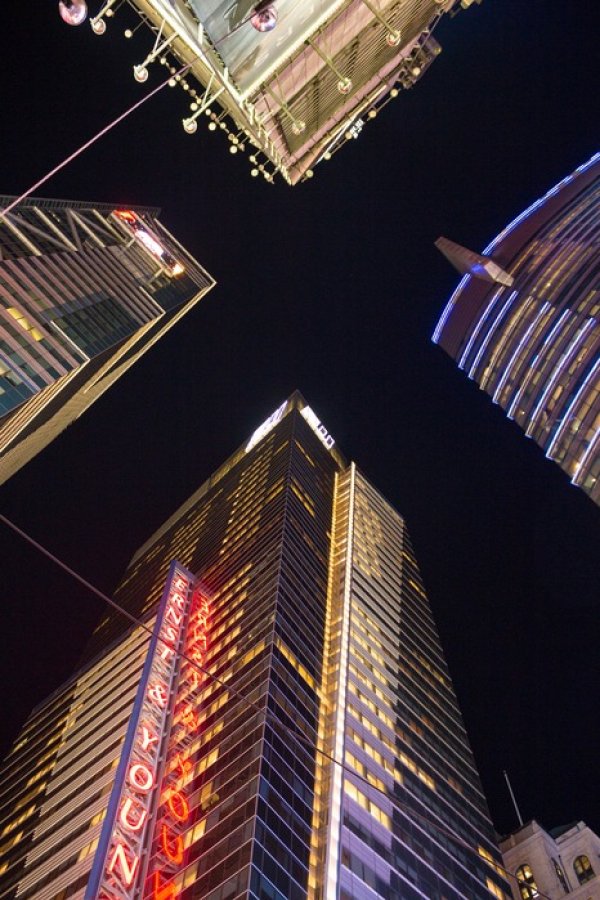
If your night scene needs more action or feels underwhelming, try using a wide-angle lens. A wider field of view will capture more of the scene and create a different effect. Here’s an example of 2 photos I took in Times Square, New York. The first at 18mm and the second at 12mm. Which do you like better?
8) Mirror lock-up (MLU)
This feature on your camera locks the internal mirror in the “up” position to reduce vibration. You cannot look through the viewfinder when activated. While this is a very similar benefit to “live view” mentioned earlier in point #3, mirror lock-up reduces vibration further by minimising use of the mechanical shutter as you take a shot. While a relatively minor aspect compared to the previous points, this technique will add another degree of sharpness to your night photos.
10) Find your lens sweet spot
Each lens is different, but most achieve maximum sharpness in their aperture mid-range. An easy rule of thumb is 2.5 to 3 stops from the maximum aperture. Here are a few typical situations:
Maximum f/1.4 = sweet spot between f/2.8 and f/4
Maximum f/2.8 = sweet spot between f/5.6 and f/8
Maximum f/3.5 = sweet spot between f/8 and f/11

Anything too low can cause a loss of sharpness at the peripheral, and anything too high causes diffusion. You can also find your sweet spot by searching Google for your lens model + “sweet spot”. Or if you prefer the brute force method by take a multiple photos of the same subject at different apertures and enlarge them to 100% on your computer to compare the difference.
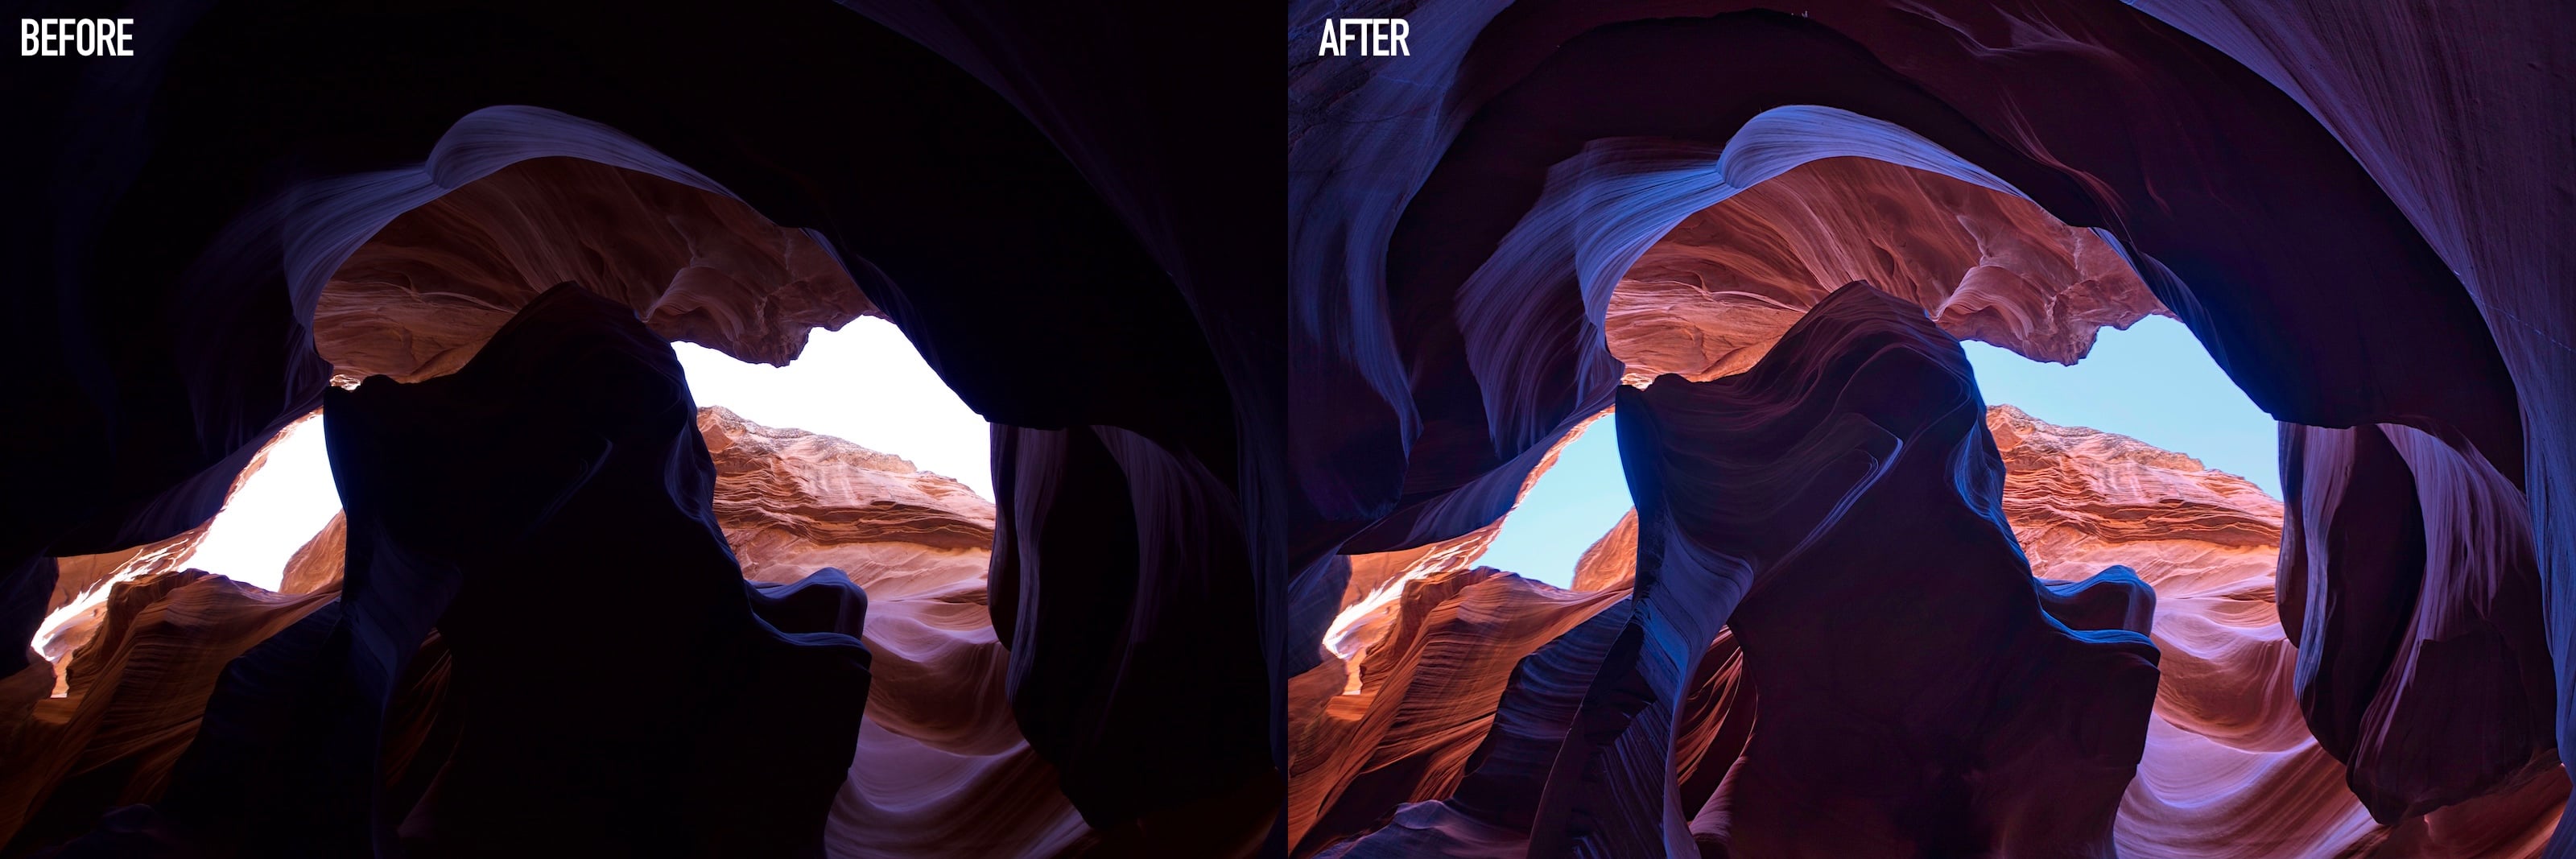
BONUS) Capture multiple frames to extend the camera's dynamic range
Even if you feel out of your depth using HDR software right now, just capture 3 frames anyway and you'll be glad you did down the track. This technique is called a "bracketed exposure". Look at your camera's manual for the exact steps to set up "auto exposure bracketing" (AEB or AE bracketing). But here's some steps for Canon and Nikon. The range of light your camera's sensor can capture is called the "dynamic range". The human eye will see more than what your camera sees. So by capturing a regular frame, underexposed frame and overexposed frame, then you can merge these on your computer using special HDR software, with impressive results. Below is an example of 1 ordinary frame (out of the 3 bracketed exposures, and the final HDR image). To get this result, this is the software I used.
The Bottom Line
These tips are just the beginning to mastering night photography. I hope you’ve found them useful and will feel more confident next time you step outside to capture our beautiful world, day or night.


Reader Comments...
"I respond to every comment by direct private email. I look forward to your feedback" - Josh BenderGreat tips Erin. Night photography can be a lot if fun. I'm always forgetting to turn off image stabilising, time and time again!
Night shooting is what I struggle with a lot, so any and all tips appreciated
Great tips here thank you
This is just the information and tips I've needed to give me the confidence to go out and try some night time photography. Some tips I'd not have considered in here like setting 'white balance' to sunlight. I'll definitely be referring back to this guide, thank you.
Firstly a great idea for a post Josh. Night photography is a whole other deal, and especially if, like me, you're learning as much hands on as possible. It can be a real disappointment to miss what could have been a beautiful shot due to lack of knowledge and skills. Thank you very much for the tips.
I love all the different examples of what you can do with night photography and create something lively and exciting. Fantastic tips and examples that were shown on this post and it is a challenge and fun, but the best thing to keep on experimenting and have a great time.
Thank you so much for posting! This will certainly help me when I take more night pictures for my blog. May need a newer camera though since mine is getting old.
I was reading through your article and I came upon the "Ghosting with flash" photo with the woman in the blue coat. I see that you posted the specifications for the photo, but I had a few questions. First, what do you mean by "first curtain"? And second, how did you do it?? How did you so perfectly display an image behind her and make her only partially see-through?? I would love to hear a full step process on how it was done. Thankyou.
Write Your Comment
Please DO NOT include links, URLs or HTML in your comments - they will be automated deleted and you will waste your time.